Recording a refund in Xero
Teaching kids about recording a refund in Xero bookkeeping.
What did I want to do?
- I wanted my kids to record a refund that we received.
- I had cancelled the Elementor plan, for which we received a refund.
- I wanted to introduce the below concepts:
- When do we get refunds?
- How to reconcile refunds?
- We have already done the following:
- Learnt the basics of reconciliation by doing a few bank reconciliations in Xero.
- Recorded multiple combinations of invoices in Xero.
Refund Transaction in Bank statement
Below is how the refund transaction hit our bank account.

A couple of observations:
- The amount refunded was 110.88 USD.
- The amount that hit our bank account was 181.42 AUD. We are expecting to see this value in Xero bank feed import.
- Even though the transaction says Value Date: 11/08/2024, the amount hit our bank account on 14-Aug-2024.
- We expect to see the date 14-Aug-2024 in the Xero bank feed import.
- We expect to see the date 11-Aug-2024 in the Elementor refund document.
Refund Transaction in Bank feed appearing in Xero
Below is how the transaction appears in Xero.
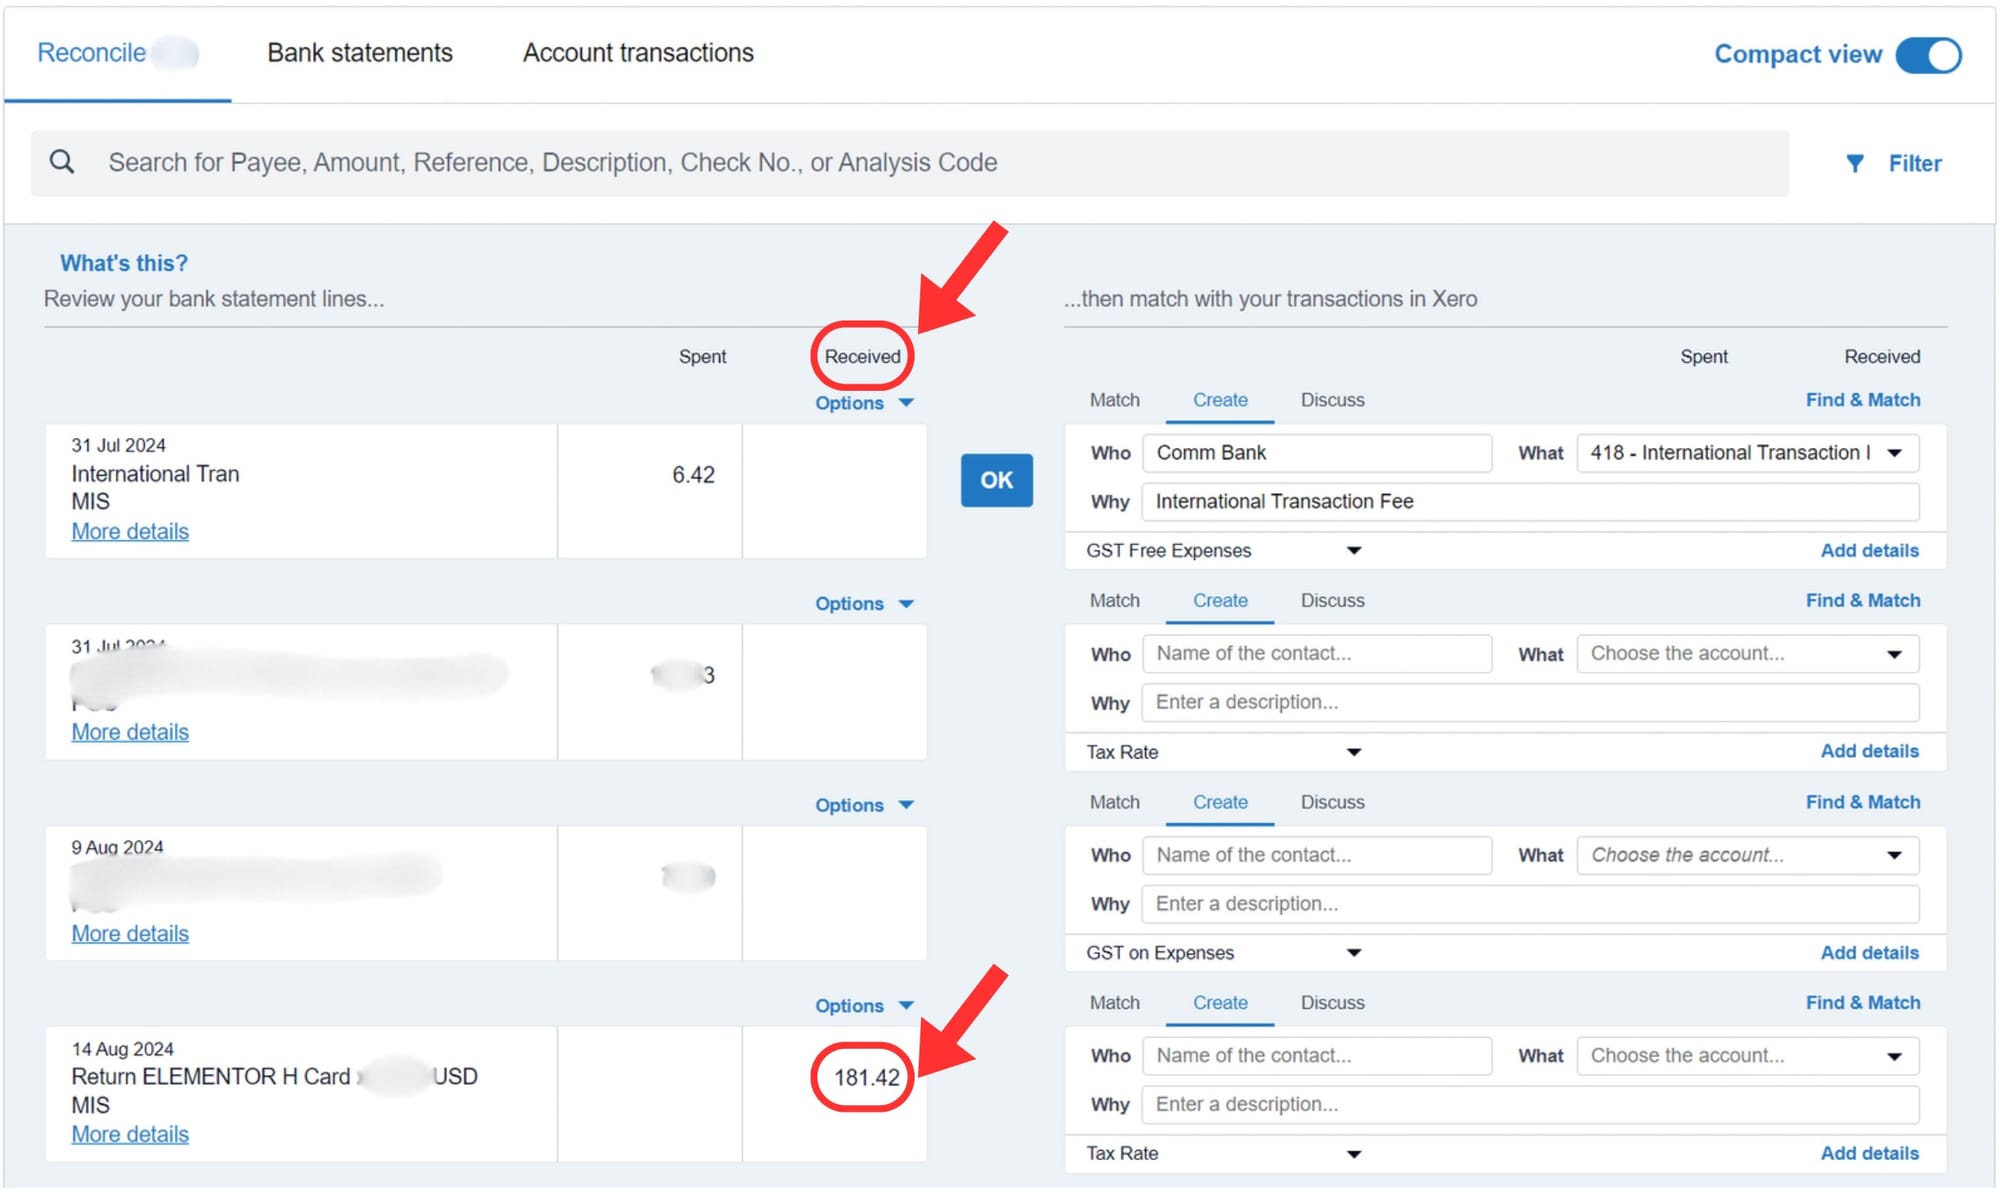
A couple of observations:
- The amount 181.42 appears in the Received column of the left section.
- The bank feed that came into Xero was also dated 14-Aug-2024.
Refund note provided by Elementor
When I cancelled the Elementor plan, below is the document I received from Elementor explaining to me how much was being refunded.
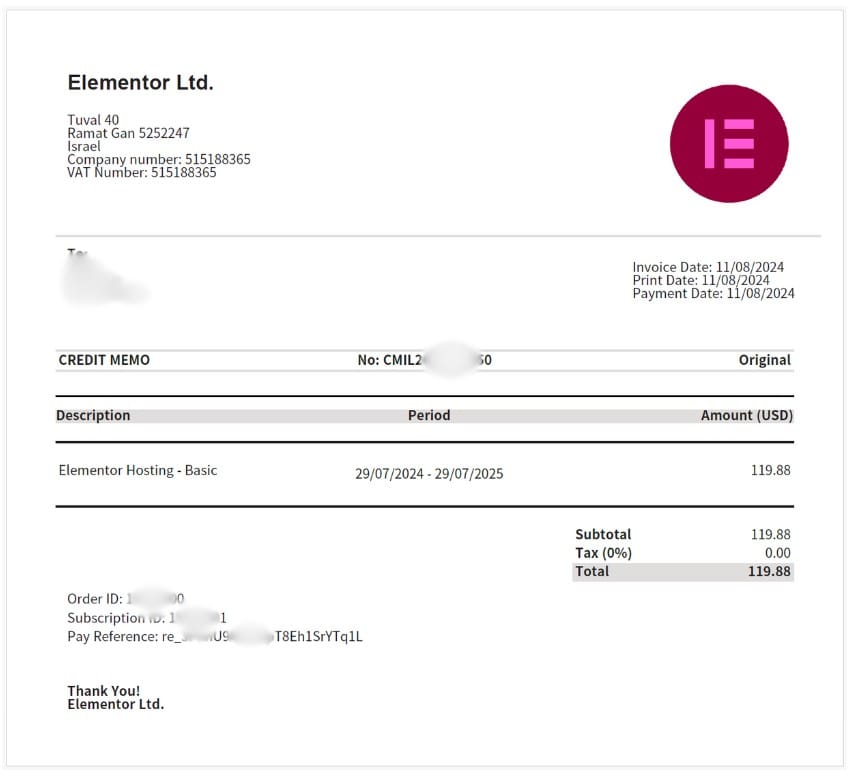
The refund credit note says that 119.88 USD is being refunded.
Note: GST is not being refunded because GST was not collected in the payment I made when I originally purchased the Elementor plan.
How to record a refund in Xero?
The refunds will need to be added by creating a new Invoice.
We have to create an invoice.
So, I showed this on my screen. This is a kind of pre-training of invoices.
- Click Business
- Click Invoices
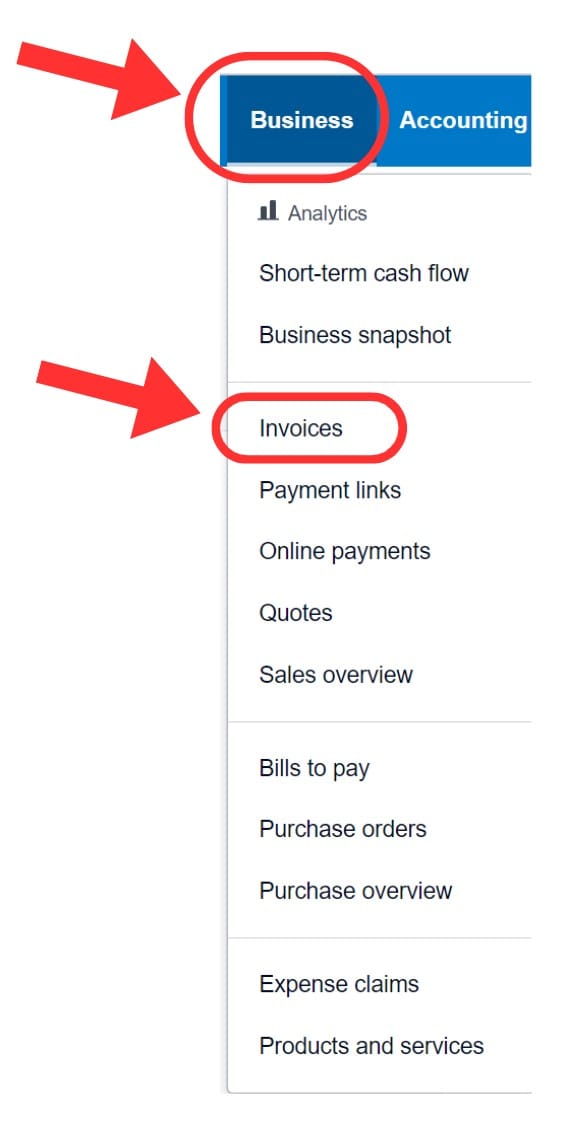
Click New Invoice

Enter the below details:
- To (the company name, in this case, Elementor)
- Issue date
- Due date
- Invoice Number
- Reference
- Description
- Price
- Account: Choose the same account you used when you made the purchase). In this example, I chose the same account, Software Annual, and marked it as a GST-free expense.

The next step is reconciliation.
We will look at reconciling the sales invoices at a later stage.
Next Step
Now it's time to record different types of invoices to see what we can learn next! Check out our next step here.
