Invite a user to Xero for Bookkeeping

What did I want to do?
- I wanted to give my kids Ash (12 years old) and Adh (10 years old) access to Xero so they can add the invoices/bills we pay.
- I gave them access to Xero after introductory training on Expenses in Accounting.
Adding User to Xero - Short Version
Log into Xero:
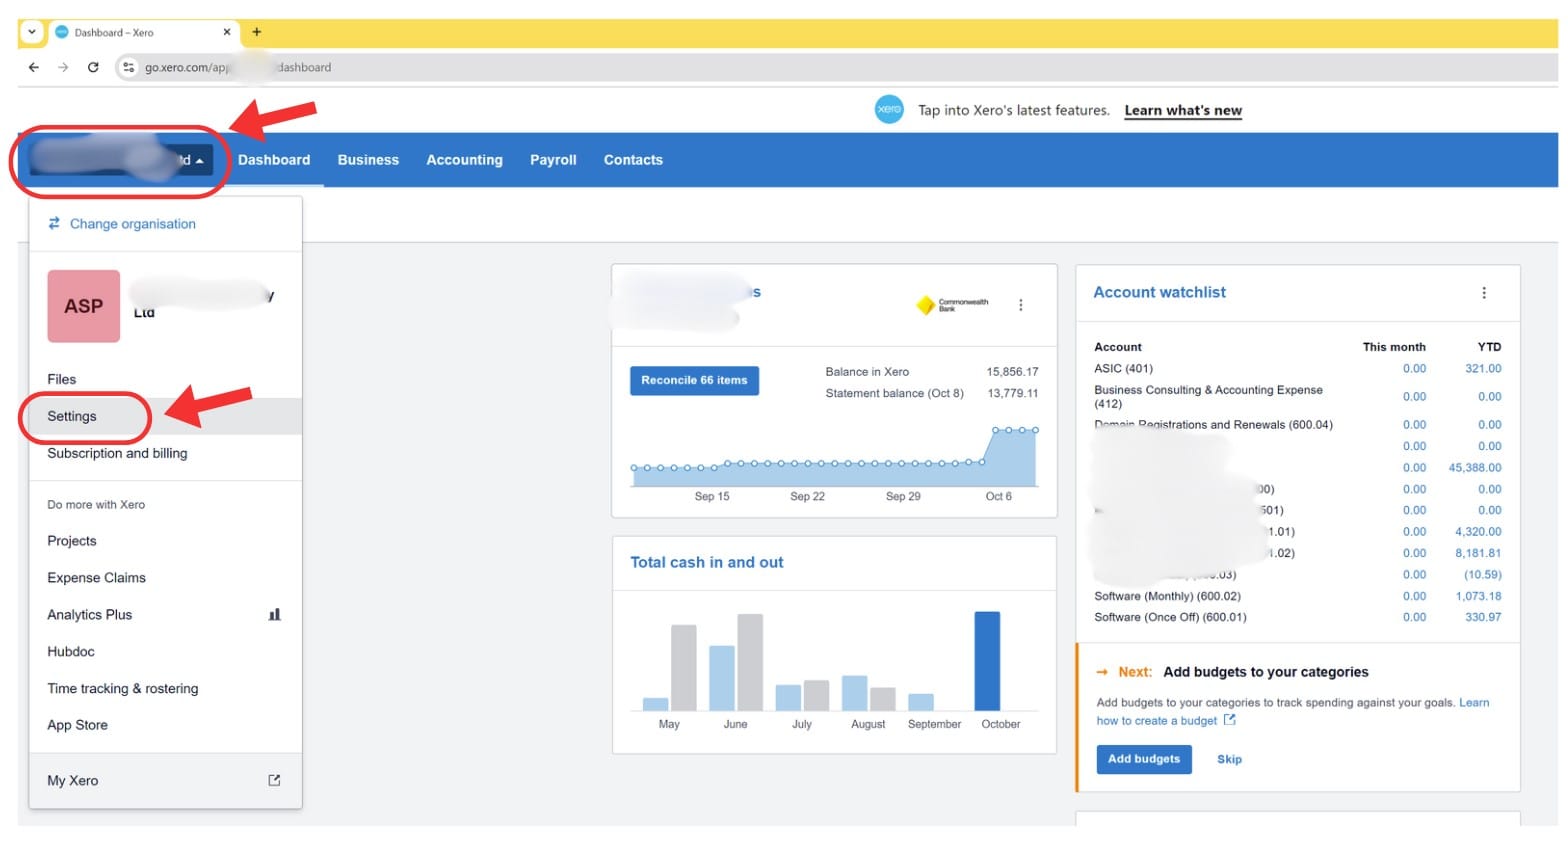
- Click on the Company Name in the top left corner
- Click on Settings
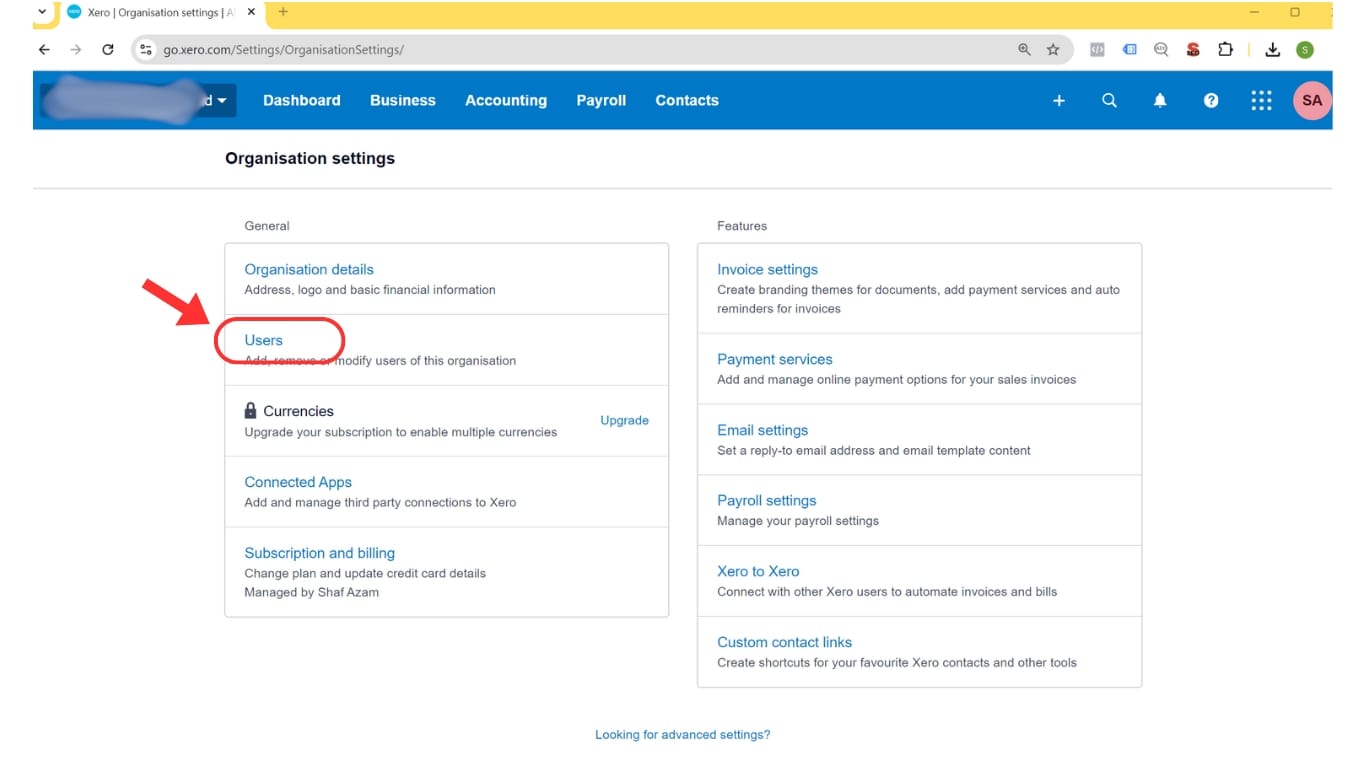
- Click on Users
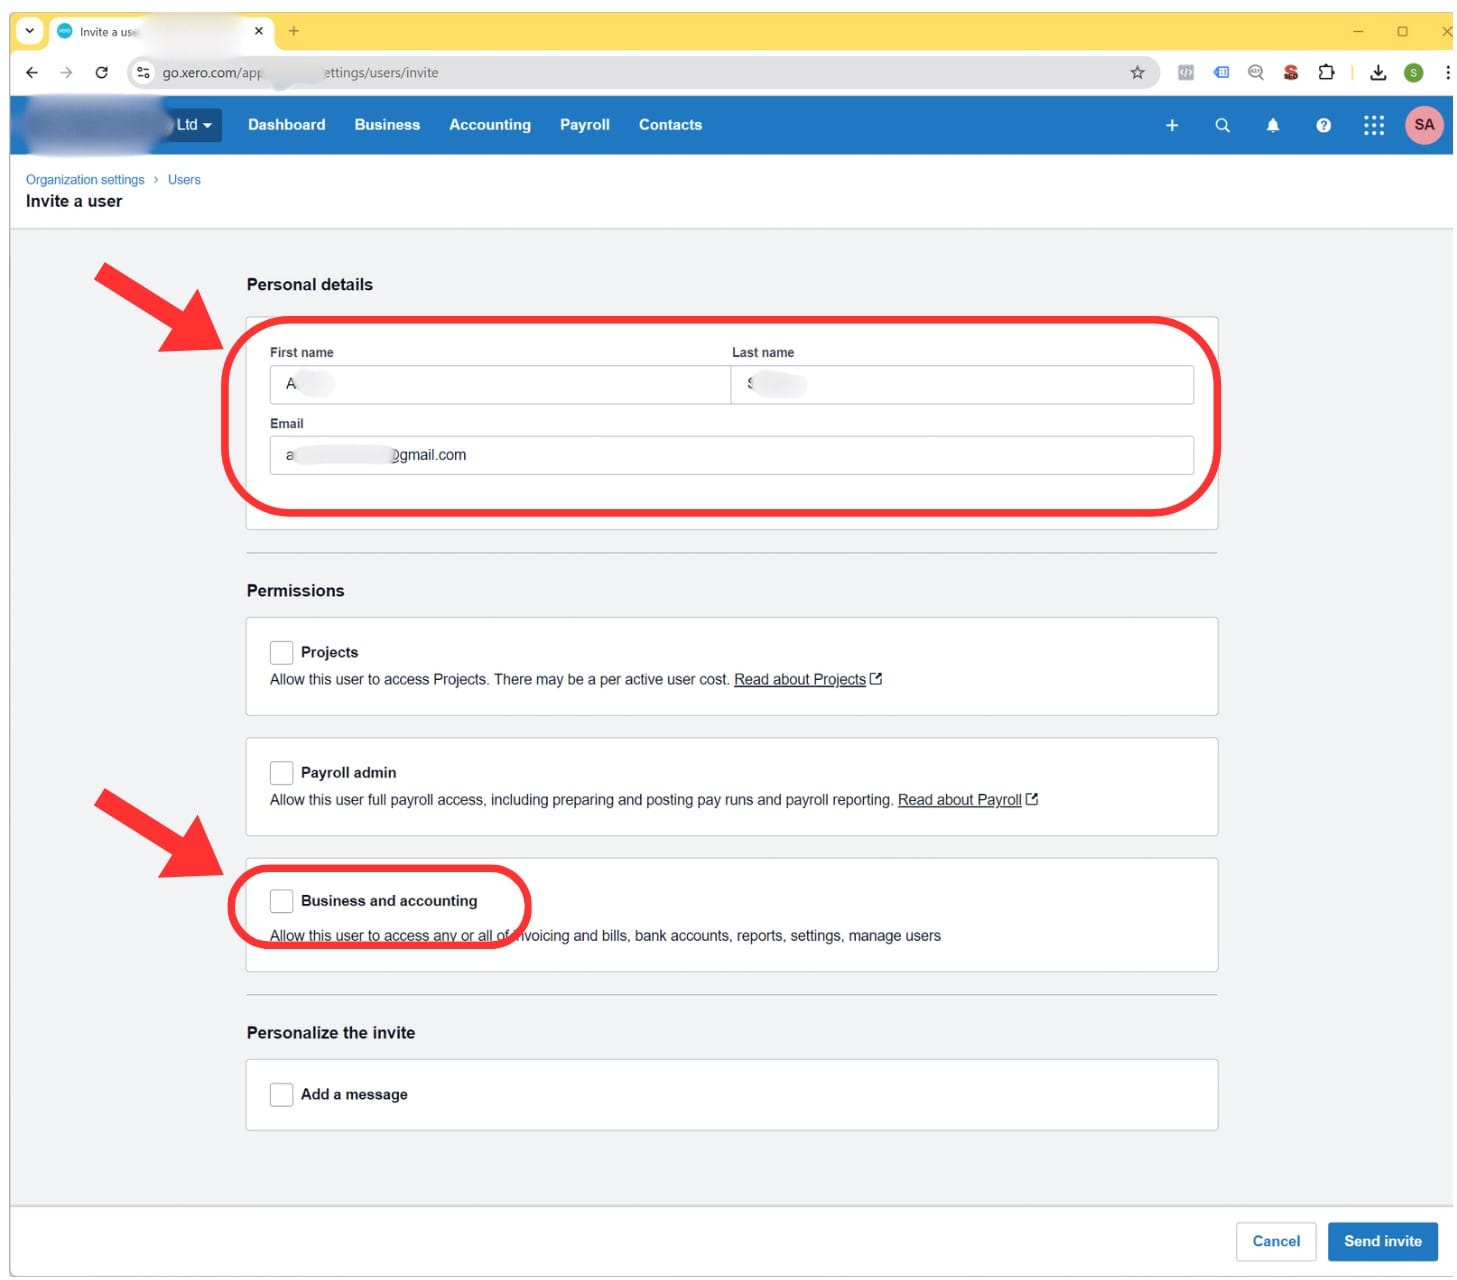
- Click on Invite a user
- Enter the First Name, Last Name and Email of the user.
Note: The user will receive an invite email to accept access to Xero. - Tick on Business and accounting
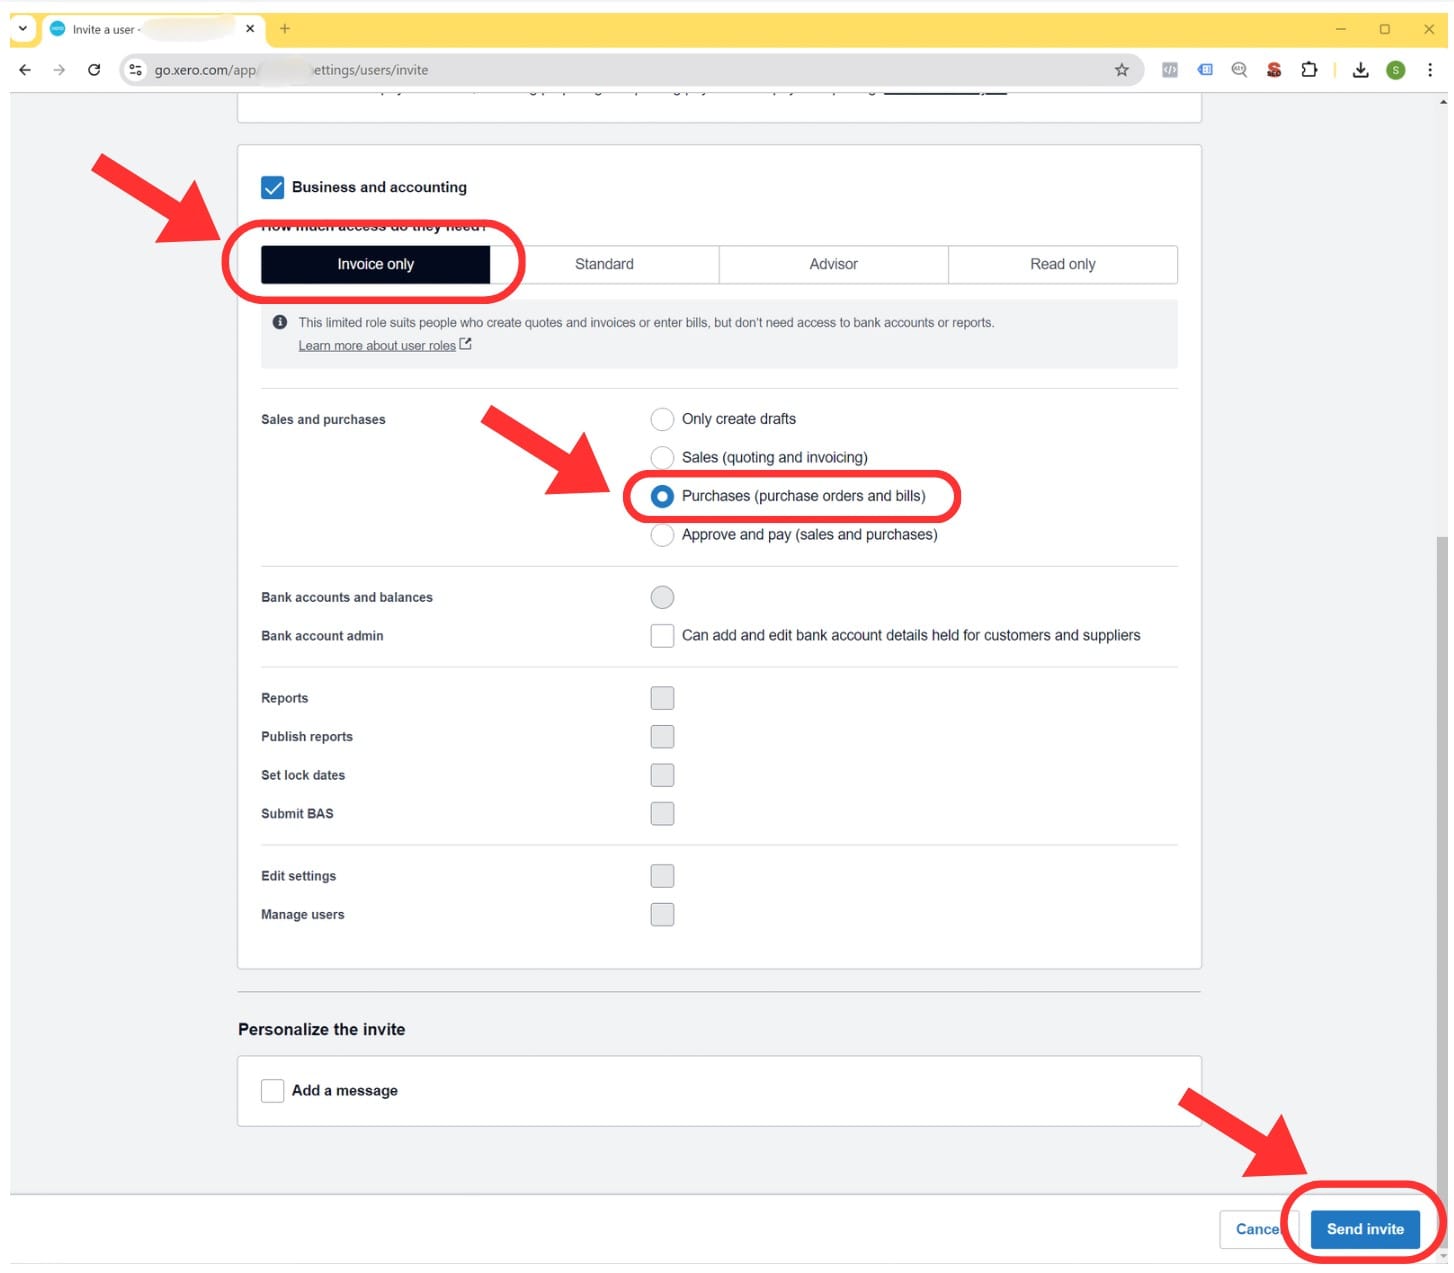
- Click Invoice Only
Note: I want the user to only be able to see and create Bills to Pay. - Tick Purchases (purchase orders and bills)
- Click Send Invite.
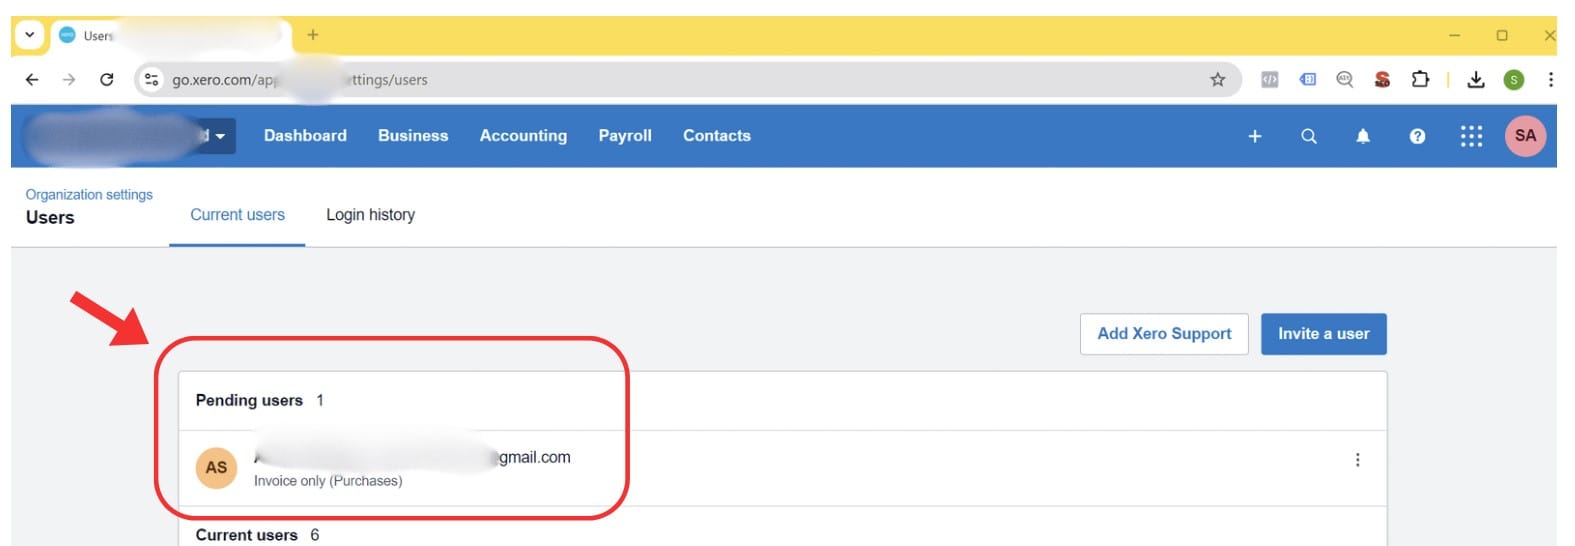
This will show the user that you have added under Pending users.
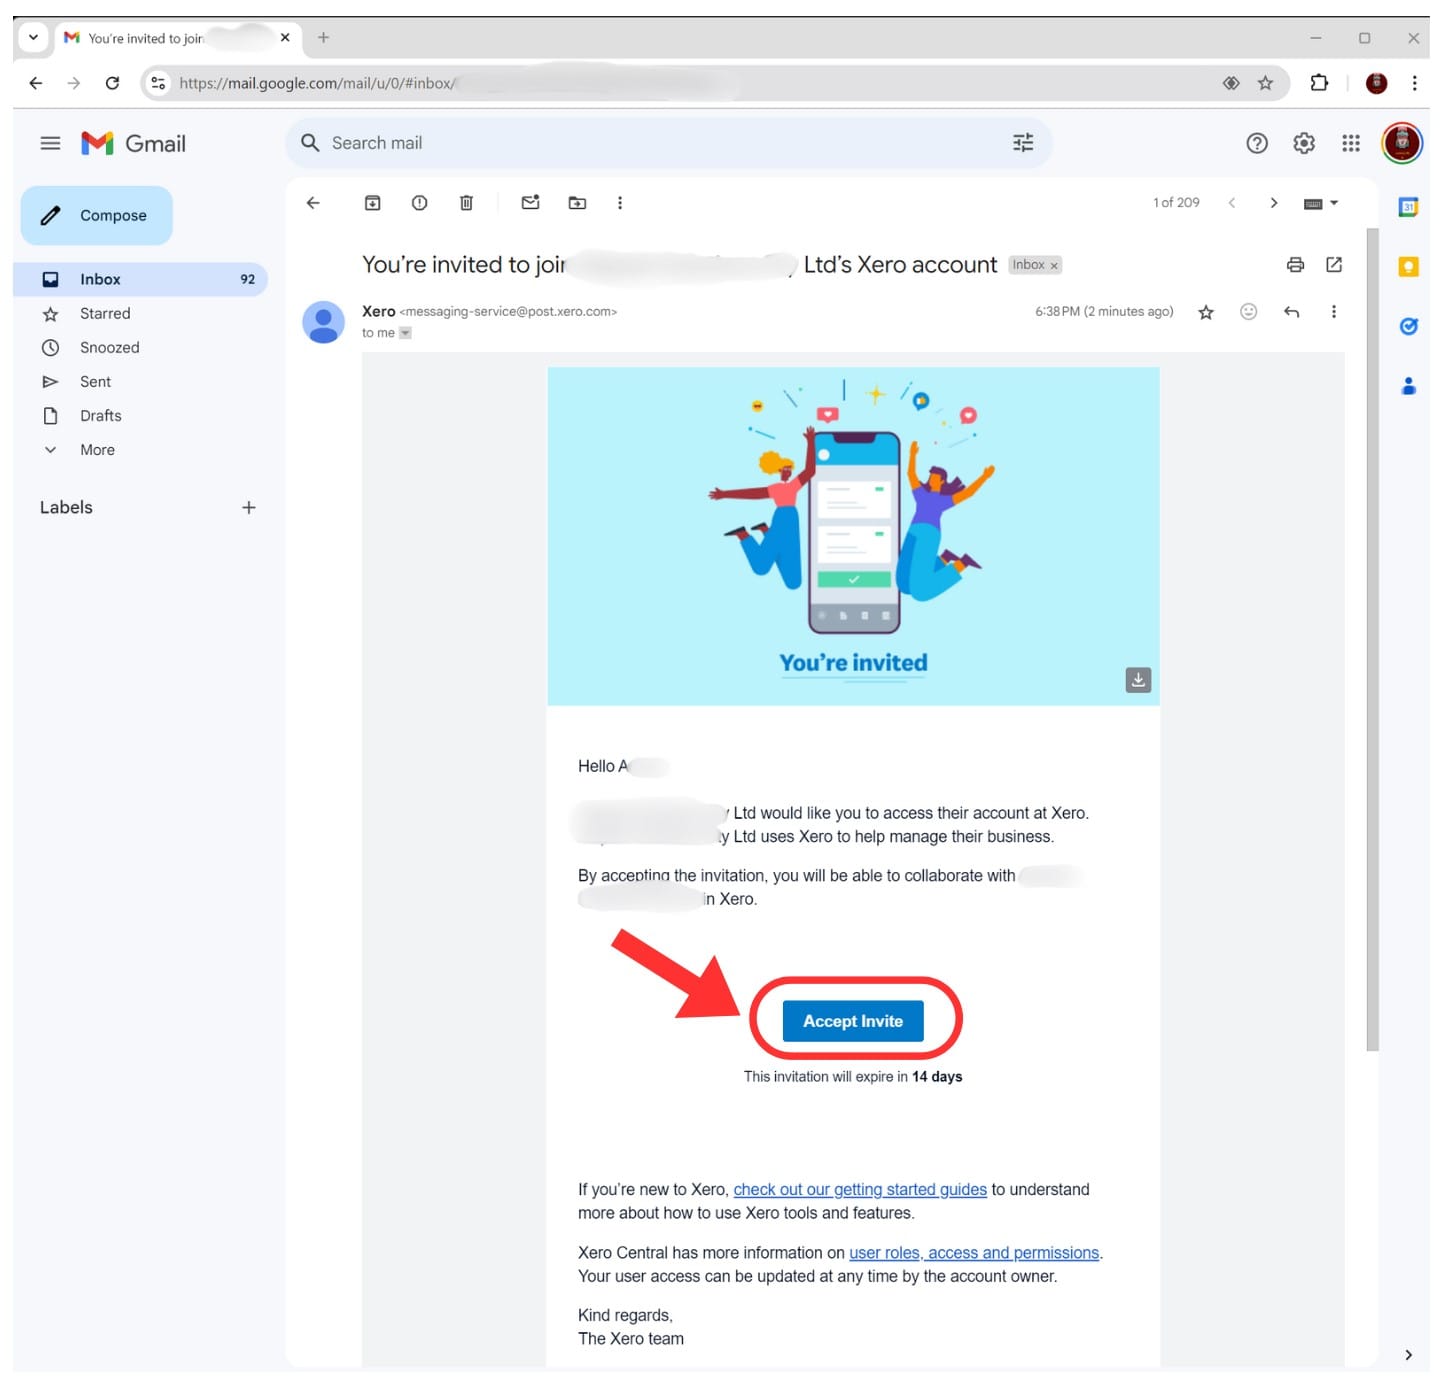
The user will receive an email.
- Open the email and click on Accept Invite
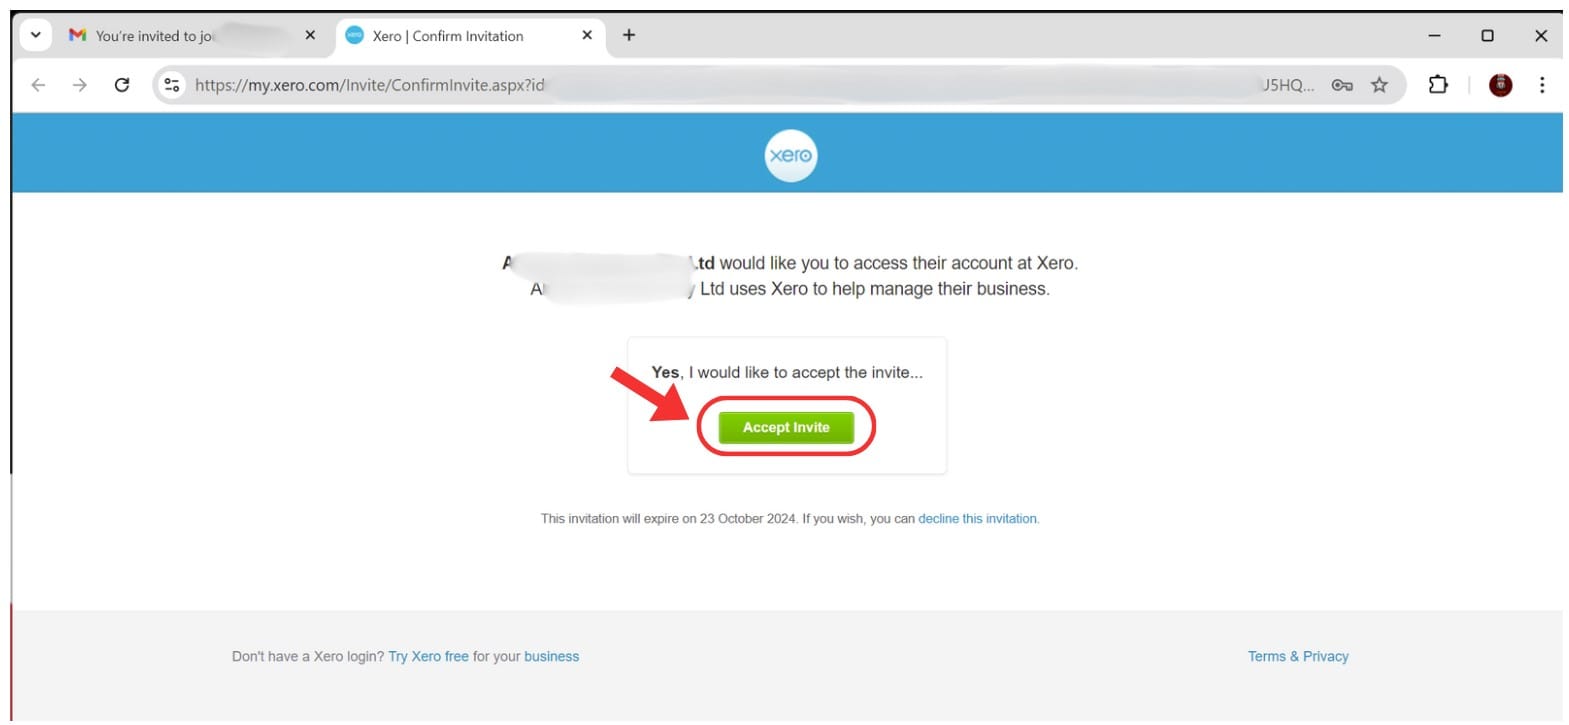
This will take the user to the Xero.com website:
- Click on Accept Invite
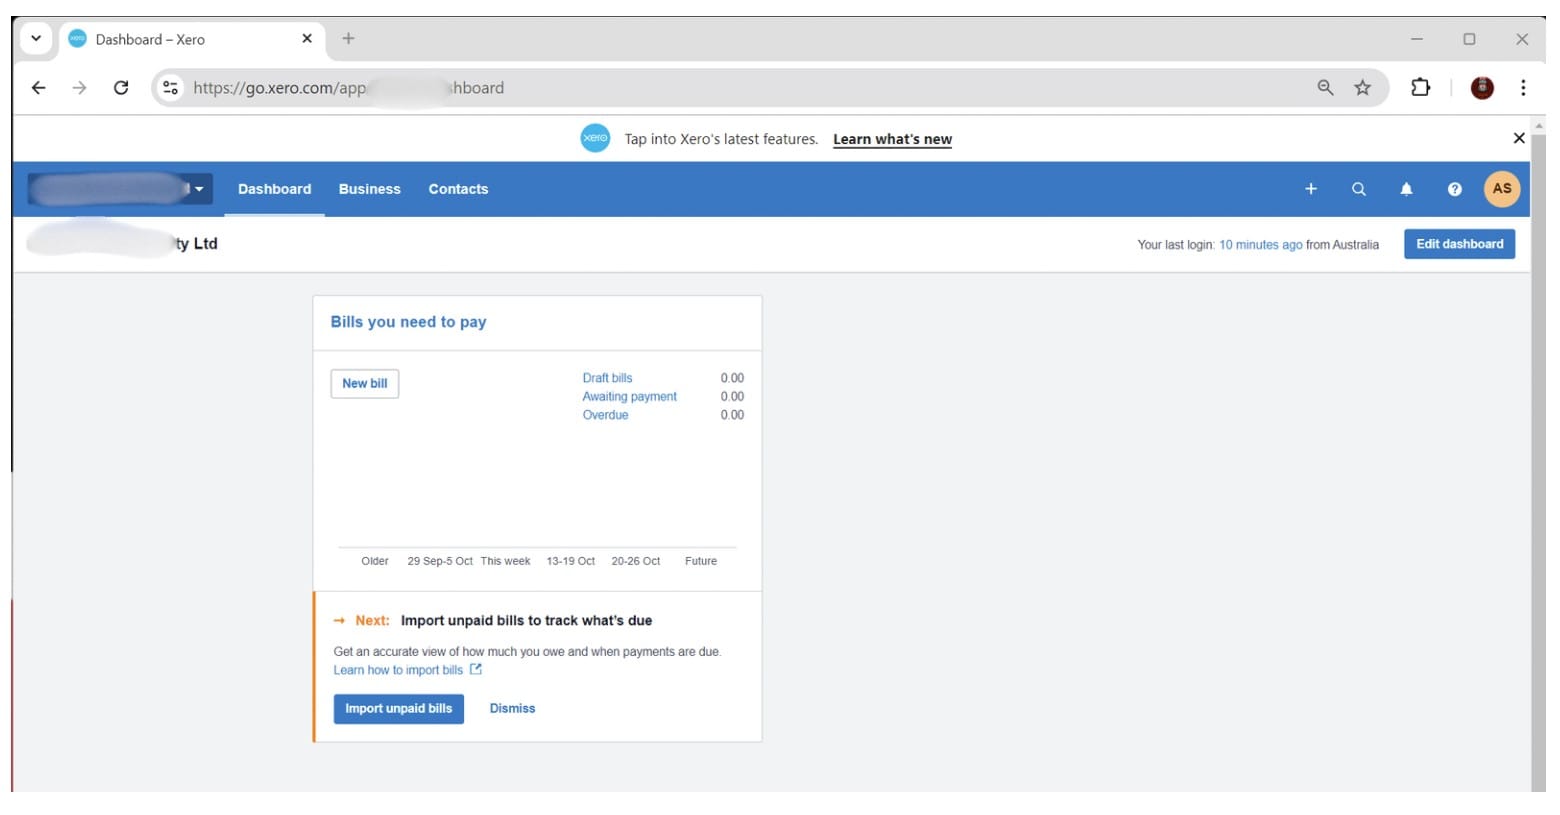
- View Xero Dashboard
Detailed Steps
[1] Invite a user to Xero
Log into Xero:
STEP 1 - Click on the Company Name in the top left corner
STEP 2 - Click on Settings
STEP 3 - Click on Users
STEP 4 - Click on Invite a user

STEP 5 - Enter the user's First Name, Last Name and Email of the user.
Note: The user will receive an invite email to accept access to Xero.
STEP 6 - Tick on Business and accounting
STEP 7 - Click Invoice Only
Note: I only want the user to see and create Bills to Pay.
STEP 8 - Tick Purchases (purchase orders and bills)
STEP 9 - Click Send Invite
This will show the user that you have added under Pending users.
Accept Invite in Email
Once the user has been invited from Xero, the user will receive an email (as shown below).
Open the email and click on Accept Invite.
Click on Accept Invite in Xero
Once the user clicks the Accept Invite button on the email, the user will be taken to the Xero.com interface.
Click on the Accept Invite button.
The user will then be taken to the Xero's dashboard.
That's it.
Next Step
Now that the boys are ready with Xero access, it's time to add their first bill to Xero.
The first bill they added to Xero was a SquareSpace Domain renewal invoice.


